

Instructions for Trainer Dashboard

The full dashboard is visible only to viewers with Dashboard privileges. Purchase here.
Any user can see the Help page you are now reading. But to see the full Dashboard, you must be logged in with an account configured for Dashboard use. You can purchase one in the Order as Trainer menu above. To request a free demo account, please email us at This email address is being protected from spambots. You need JavaScript enabled to view it..
After you buy the Dashboard, we configure your account accordingly, which may take up to a business day. We will email you when it is ready for use. To login, go to the Trainers/Dashboard item the top menu on the front page of our site or click here. Login with the login and password you used when you purchased the Dashboard.
After you log in, a Dashboard menu will appear on the left. (This is visible only after you have purchased the Dashboard and we have configured your account.)
EDIT INVITATION TO YOUR USERS
In the Trainers menu to the left of the Dashboard is a button "Edit Registration Note". When you click on it, you will find an easy-to-edit page already pre-filled with suggested text. Edit this as you wish, including, if appropriate, instructions about printing out the score report and bringing it to your workshop.
There are a couple sections of the registration note you can't edit: The sentence with a clickable link for users to go to the inventory is not accessible to your edits. Neither is the paragraph with the information for manual login.
If you want to add any special instructions to your users, this registration email is an easy way to communicate them. For example, you might add: "When you have completed the inventory, please print out a copy to bring to class. Please also take fifteen minutes to work through the first three items in the Tutorial (see menu at top of page when you are in the inventory) before class."
Save the Registration Note. Be sure to click the button at the bottom of the page when you are finished, "Save Registration Note Edits". If you do not Save, the text will revert back to the default text. At any time in the future you can revert back to the default text by clicking the "Restore text" button at the bottom of the page. See below.
![]()
REGISTER USERS
Make sure you have new user accounts available. To see how many user accounts are available to you, check the counter on the top right of the Dashboard. You can buy more here. (Academic and non-profit here.)
To register users. There are two ways to do this:
Option 1: Register each user manually, one at a time. This is more intuitive for most users and faster if you are entering only a handful of names. (But if you are entering dozens of names, it is worth taking a few minutes to read instructions and using option 2 below.)
To enter users manually:
Click on “Create User” to bring up a registration form. Here's what you'll see:

You must enter all of the following:
- Name. Whatever you enter here will appear at the top of that user’s Score Report. Eg: if you enter “John Doe”, at top of the Score Report it will say “Report for John Doe”. Spaces between names are okay.
- Password, entered twice. Password can be any combination of six or more letters, numbers, or symbols. You can ignore notices that say you must have all of those. If you are creating several users, you can use the same password for all, but remember that some users might figure this out and be able to access the score reports of their classmates. Best practice would be diverse passwords.
- Email. Our server imposes two rules regarding emails. One, whatever you enter in this field must be in standard email format, that is, This email address is being protected from spambots. You need JavaScript enabled to view it.. Two, you cannot use the same email address twice, ie:, for more than one account. A warning message will appear within a few seconds if you fail to observe either of these. (If you delete someone's account and then want to recreate a new account with the same email address, you must remove them from the Archive first. See instructions in the Archive section below.)
Click on one of the “Register” buttons at the bottom.
Option 2: Enter user names in a .csv file and upload that file to the server. See option in left menu, Import List of Users from .CSV for instructions. This is by far the fastest option if you are doing many users. (If 40 or less it might be faster to do manual entry as creating a CSV file and uploading takes a few minutes.) The server is unforgiving in insisting that you create the CSV file in exactly the format described, but if you get this right, you can reduce registration time by at least 50%. The server automatically assigns a password when you use this option. If you have trouble loading a CSV file send it to us and we'll do it for you at no charge. See the note about this in Import List of Users from .CSV.
This option also gives you an extra data field for each user, a feature that is especially nice for profs with students in several sections. You can easily group students by section on your dashboard with this field. See the instructions at Import List of Users from CSV about how to do this.
DELAY USER ACCESS TO REPORT?
A few trainers want to give users their reports only at the time of the workshop and block access till then. In the screenshot below, the third column is "Users can see report?" By default, this setting is Yes, which sends the report to users. By clicking on the Yes/No button and then Confirm, you can change that setting for any user. Or you can change the setting for all users at once by following instructions in the grey row at top of that column. 
What do users see with the Yes setting? With the No setting? If Show Report is set to Yes, your users will see a Score Report and have access to the tutorial on our site as soon as they take the inventory. If Show Report is set to No, they will instead see the screen below after they finish taking the inventory. Either way, by default you will receive a copy of score reports of users as soon as they take them, sent to your email account. (Instructions on changing the Copy Setting below.)
USER VIEW WHEN "SHOW REPORT" SETTING IS NO
Screen as viewed by users when Dashboard is set to Show Report to User/NO. This setting sends a score report directly to the consultant and blocks user from seeing scores.
INVITE USERS TO THE CONFLICT STYLE INVENTORY
Now you are ready to send the registration email to the users in your dashboard. You can send this to users one at a time by clicking the Send button in each row in your dashboard. For many, it is much faster as a Bulk Operation - see instructions for this at the very top of the dashboard. Important, when you send using Bulk Operations, the server sends only to those users visible to you when you click the Send button. You can increase the number of visible users with the little setting in the middle at the top of the dashboard.

how many See the 2nd note in the "Important Notes" section above to learn how to change the number of users visible to All (in the lower right hand corner of the dashboard).
Your users will receive an email like this:

That blue button has their login info embedded in it. When your users click on it, they will be transferred to our site, logged in automatically, and land in the first page of the inventory. If the blue button image doesn't display in the user's browser, the email contains info for manual login.
If you want to send different registration notes to two or more different groups of people, do it this way:
1. Edit the note as desired for the first group (and save it)
2. Select the users from one group and send the note to them using Bulk Operations.
3. Re-edit the note as desired for the second group (and save it).
4. Select the users from the second group and send the note to them using Bulk Operations.
Tip: Text that you Save in the Registration Note will stay there until you change it. If you use several different notes repeatedly, you may want to keep the text of these notes in a file on your computer so you don't need to re-enter the text everytime you change notes. You can do it as follows: Click on the "show/hide" toggle on the web editor menu. This brings up the underlying html code. Use Control A to do a global select of the whole page of html code, then use Control C to copy it. Open a file in Notepad and paste the selection into a file using Control V, and save. Then reverse the procedure in the future when you want to use that text. Ie: copy the text from the Notepad file, click on the show/hide toggle to turn on html mode on the web editor, paste the html into the page, and save the page.
Log of Registration Notes. In the left menu of the Dashboard is a Log of Registration Notes to see a list of those users to whom you sent registration notes and when.
MANAGE AND MONITOR THE DASHBOARD
ALLOW TIME FOR TESTING
It is important to test the setup at least a day and preferably more before you send a whole group through. Give your login instructions to at least one “guinea pig” not familiar with them and ask this person to take the inventory. (This is a gratis user, so far as we are concerned; you need not count this person in the number you are paying for. If necessary, send us a note about this and we'll add the number of users you request to your Dashboard.) Chances are good you will discover something that to you seemed clear but was not to your user. We are eager to help but cannot guarantee a response to questions in less than a full working day.
IMPORTANT NOTES REGARDING CHANGING SETTINGS
- You must click Confirm after changing the Yes/No setting. This applies to both individual and global changes. If you do not, the new setting shows on your screen but is not in fact recorded on our site. You will know the change has taken effect when a small notice appears after you click on Confirm to let you know you have been successful in changing the setting.
- If you use Global changes you must choose how many users you want to change at once. When you use the Global Select box in the gray top at the upper left of your dashboard,
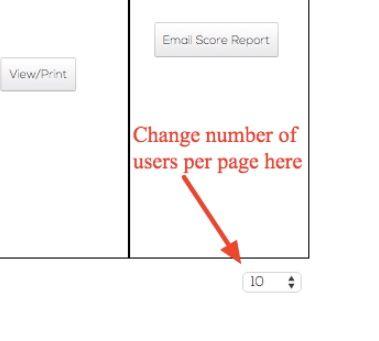 only the users on the page visible at that moment will be affected. So if you want to change settings for all users in your dashboard at once, you must first change the setting on the upper right corner of the dashboard to make All users visible on one page. Just beneath the red letter text showing your user count, you will see "Number of Users per page" Choose All or however many users you want to see on each page.
Important: If you have 100 or more users in your dashboard, it takes several seconds to re-load the page after every action. If the screen goes white, it's not a malfunction, you just have to wait till this huge page loads!
If you leave the setting at 10 or 20 or 50, the dashboard will display that many users per page. A change in this setting takes place immediately, and it does not have to be Saved. You can easily change it back to previous settings. If you have a lot of users in the dashboard, on many pages, you can see the number of pages on display beneath the dashboard and you can click on those numbers to navigate to other pages. - To change the order of the names in the list. By default, the list is ordered in the sequence names are added. But you can easily change that. Go to the top of the Name column in the dashboard. There you can choose whether you want names to be displayed alphabetically according to surnames or by date of registration. Be sure to click Confirm after you have chosen the setting you want.
TRACK YOUR ACTIVITIES ON THE DASHBOARD
There is a LOG button on each user that records all communication with that particular user. There is also a Log of Registration Notes Sent in the left menu of the dashboard that tracks mass emails.
SEND ADDITIONAL COMMUNICATION TO USERS
In addition to the Registration function described above, you can easily send a communication to all your dashboard users or those you select by using the Send Note function. In the left menu, click on the Send Note menu item. Enter your text there and Save it. Then go to the Dashboard and click on the box beside those users you want to receive the note. If you want all to receive it, click on the box in the top row and it will select all. (See Important Note 2 above - it sends only to the users visible on one page, but you can change that setting on the lower right of the dashboard.) Then use the Multi-User button in the top of the Dashboard and select Send Note in the drop-down menu.
MONITOR USERS AND SEE WHO HAS TAKEN THE INVENTORY.
To see who has taken inventory. You can at any time see who has taken the inventory and who has not by going to the Consultant Dashboard. You must be logged in, of course, to be able to view your users on the Dashboard.
In the "Report Status" column, you can see at a glance who has take the inventory and on what date.
Receiving copies of score reports by email. A copy of all score reports from users in your dashboard is by default sent to you as owner of this dashboard, going to the email address you used in registering this account. If you prefer not to receive these, you can easily change this yourself. In the left menu, click on Autoforward Score Reports. There you can switch off autoforwards or add an additional email account to receive copies of score reports. This additional account may or may not be otherwise registered in the Riverhouse database.
Log of all interaction with a given user. In the Name column, there is a small "Log" button for each user. Click it to access a record of all events for that user. Events recorded include: Sending the user a Registration or special Note, Taking the inventory, Downloading the Score Report to the consultant, Sending a link to the Score Report from the dashboard to the user.
MANAGE USERS ACCOUNTS - ARCHIVE, DELETE, AND RESTORE
Users whom you Archive can be restored again to the Dashboard later by using the Restore function. Users you Delete from the Archive are permanently removed.
To Archive User:
1. Click in the box(s) to the left of the name(s) you wish to archive.
2. At the top left side of the Dashboard, under “One-Click Operation for Multiple Users,” choose “Delete” and then “Confirm.”
3. Name will be moved to the Archive but is still in the system. User cannot access their account when their name is in the Archive.
To Restore Archived User to Dashboard:
1. Click on “View/Restore Archived Names” at top right of Dashboard.
2. Click in box to the left of name you wish to restore to Dashboard.
3. At top left of Archive, chose, “Restore” and then “Confirm.”
4. Name will now be moved to Dashboard.
To Permanently Delete User:
1. Follow above steps.
2. Click on “View/Restore Archived Names” at top right of the Dashboard
3. Find the users name in the Archive.
4. Place a check in front of the name.
5. At top left of Dashboard, choose “Delete Permanently” and “Confirm.”
6. Name will be deleted from the Riverhouse ePress system.
Note: Permanently deleting the name of a person who has not taken the inventory gives you an additional user slot on your Dashboard. If you want to delete someone's account and make a new one for them, you have to both Archive and Delete Permanently that person's email from our accounts. The server will not allow two accounts to be established for the same email address.
GET HELP IN DESIGNING YOUR TRAINING WORKSHOP
Don’t miss our free Trainers Guide. Download it now from the Riverhouse online shopping page.

GIVE US FEEDBACK
We love squeaky wheels! Tell us what you think about this Dashboard. Your complaints and praise help us improve the site. This email address is being protected from spambots. You need JavaScript enabled to view it. Or fill out a 60 second feedback survey of the Conflict Style inventory here.
Updates:
- October, 2015. Updated info regarding new functions for managing, searching and deleting users.
- February, 2016. Added info on Global Send function.
- March, 2018. Updates about the simplified process for Registration notices.